Build Your First Eleventy Site
Eleventy is a great way to build websites. It’s powerful and flexible, but basic to begin with. So you can keep things simple and only add extra features as you need them.
The main drawback of this simplicity is you need to decide what to add. Often there are many different ways to achieve the same thing - and there’s no recommended right way of doing it. When I started with Eleventy I found the docs to be detailed, but had trouble understanding how the different parts fit together.
So in this article, I’ll take you through what you need to know to set up your project, and we'll build a basic portfolio site for Jimmy Jones, a monkey journalist.
This example site will show you how to do all the things you'll want to do in your first site. Like add styles, fonts, favicons, use different layouts, reuse parts of the page, add blog articles written in markdown, and add images.
👉 Check out the site you’ll build
If you know some basic HTML and CSS you should find it easy enough to follow along.
We're going to build our site and knowledge as we go, and will cover:
- Creating your new Eleventy project
- Using templates
- Adding sections of our site with partials
- A simple way to add styling
- Building out Jimmy's portfolio site
- Adding a collection of articles
- Finishing touches
- Next steps
A quick note: what is Eleventy?
If you’ve found this article you probably already know about Eleventy, but just in case you don’t, let’s quickly cover what it is and why you might want to use it.
Eleventy is a static site generator. It takes files and data of different formats and converts them into the pages of your website. You can then publish the site Eleventy generates using a service like Netlify or Render.
Eleventy gives you a few great advantages over other frameworks for building websites:
- By default Eleventy doesn’t ship with any JavaScript for your users to download, which makes it fast.
- Your site is static HTML, which makes it easy for search engines to find your site and content.
- You don’t need a server for your site, so it’s cheaper to host.
- Because you don’t have a server there are fewer security vulnerabilities and you don’t have to worry about your site going down when you get too much traffic.
With Eleventy you can create a website with a lot of features. It’s great for marketing sites, portfolios, and blogs, but like all static sites, it does have its limitations. If you want to build a full web app you’re better off reaching for a server-based framework like Rails, Phoenix, Laravel, or whichever you prefer.
Alright, let’s get cracking.
Creating Your New Eleventy Project
To start with we’re going to use the terminal to create a project directory and add our first files.
Open up your terminal and navigate to where you want to put your project.
Now create a new directory for your project. I’m going to call mine eleventy_starter_site:
mkdir eleventy_starter_siteNavigate into that directory (e.g. cd eleventy-starter-site). Now we need to create a package.json file. We’ll do this with the following command (the -y flag means you’ll automatically accept all the default options):
npm init -yThen, we’ll add a local version of Eleventy to our project by running:
npm install --save-dev @11ty/eleventyAt this point, you might find it easier to work in your text editor. Crack open your project directory (eleventy-starter-site) in VS Code (or whatever you’re using).
We want to save our project using git, which by default will save everything in our project. But there are some things we don’t need git to keep track of. We can let git know what it doesn’t have to save by creating a new file .gitignore in our project directory, and adding the following to it:
# Misc
*.log
npm-debug.*
.env
.cache

# Node modules and output
node_modules
public
What we’ve done here is tell git to ignore any log or debug files, environment variables, which we use to keep our passcodes, the cache, the node_modules folder, and the output folder, which we’ve called public.
The output folder is where Eleventy will put all our final site files. But by default, Eleventy uses _site to put the output files and will look for the input files in the project (root) directory. We’re going to change these defaults to public for the output, and src for the input. You can call these whatever you want - I find these names make it clear what each is for.
To make the change we need to create an Eleventy config file and let it know what we want to do. In your project folder, create a new file eleventy.config.js and add:
// eleventy.config.js

module.exports = function (eleventyConfig) {
  return {
    dir: {
      input: "src",
      output: "public",
    },
  };
};
Now Eleventy will be looking for files in the src directory. So we better create it - add a new directory src to your project.
Let’s also add a file for Eleventy to render. In your src directory, create a new markdown file index.md and add:
Hey, hey!Alright, we’re almost ready to try it out. Before we do, we’ll make it easier for ourselves to start the Eleventy server or create a build.
Open up the package.json file in your project directory and update the "scripts" section. Above the line starting with "test" add the following two new lines:
    "start": "npx eleventy --serve",
    "build": "npx @11ty/eleventy",
When you’re done your package.json file should look like this:
{
  "name": "eleventy_starter_site",
  "version": "1.0.0",
  "description": "",
  "main": "index.js",
  "scripts": {
    "start": "npx eleventy --serve",
    "build": "npx @11ty/eleventy",
    "test": "echo \"Error: no test specified\" && exit 1"
  },
  "keywords": [],
  "author": "",
  "license": "ISC",
  "devDependencies": {
    "@11ty/eleventy": "^2.0.1"
  }
}
Ok, let’s see if everything is working. In your terminal, from your project folder fire up the Eleventy dev server with:
npm startGo to your browser and look for localhost:8080 - you should see your new site!
It’s not much at the moment, but it’s something we can build on.
Using Templates
As you can see, Eleventy is set up to run markdown files (our index.md). By default it works with multiple templating languages to help us create pieces of reusable code - and to dynamically create content when Eleventy builds our site.
For Jimmy’s portfolio, we’re going to use Nunjucks. Built by Mozilla, the catch line is, “A rich and powerful templating language for JavaScript”. It’s a popular option that’s used by many of the people sharing what they’re building with Eleventy, so using Nunjucks will make it easier to follow along with their examples when you’re trying new things.
Eleventy can already read Nunjucks files, so if we created a .njk file it would process it for us (much like it did the .md markdown file). This is great, but even better is using standard HTML pages.
Eleventy makes this simple. All we need to do is update our Eleventy config file so Eleventy knows to process markdown, data, and HTML files with Nunjucks. This is done by stating the template engine in the three lines below return:
// eleventy.config.js
module.exports = function (eleventyConfig) {
  return {
  markdownTemplateEngine: 'njk',
  dataTemplateEngine: 'njk',
  htmlTemplateEngine: 'njk',
    dir: {
      input: "src",
      output: "public",
    },
  };
};Now we can create our base template so we don’t have to write all the main HTML boilerplate for every page of our site. Based on how we’ve configured our directories, Eleventy will look for layouts in src/_includes, so let’s create the _includes folder in src. Then add another new folder layouts, in the _includes folder, and add a base.html file inside of it.
Then paste the following into base.html:
<!-- /src/_includes/layouts/base.html -->

<!DOCTYPE html>
<html lang="en">
  <head>
    <meta charset="UTF-8" />
    <meta name="viewport" content="width=device-width, initial-scale=1.0" />
    <meta http-equiv="X-UA-Compatible" content="ie=edge" />
    <title>{{ title }}</title>
  </head>
  <body>
    <main>{% block content %}{% endblock %}</main>
  </body>
</html>
Ok, so this is our base template. All the pages we create will build on this. A few points to note about it:
{{ title }}is a placeholder for thetitlevariable, which we can set either for the entire site or each page.- Content on pages or layouts using the base template will be placed between the
{% block content %}and{% endblock %}tags.
Let’s use the base template for our home page (also known as 'extending' the layout). In the src/_includes/layouts folder create a new file home.html and add the following:
<!-- /src/_includes/layouts/home.html -->

{% extends "layouts/base.html" %}

{% block content %}
  <article>
    <h1>{{ title }}</h1>
    {{ content | safe }}
  </article>
{% endblock %}
This does a couple of things. First, it tells Eleventy this template extends the base.html template. Then it specifies what needs to go in the block content section of the base.html template.
Again, this template uses the title variable to set the <h1> tag (similar to how we used it for the <title> tag in the base template).
And lastly, it has {{ content | safe }}. This is used to render markdown content. For security, we don’t want anyone injecting HTML into our site. But because we’re the ones doing it, and it will only happen when Eleventy builds our site, we want to allow it. We do this by adding the safe flag to let Eleventy know our HTML is safe to render on the page.
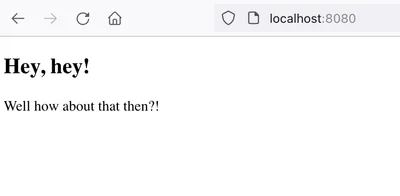
The last thing to do is use our shiny new templates. In index.md, delete what’s there and replace it with:
---
title: 'Hey, hey!'
layout: 'layouts/home.html'
---

Well how about that then?!
The data at the top of the file between the dashes (---) is called Front Matter. The syntax we’re using is YAML. We can use the front matter data to set variables that are used when our page is built (anything in the front matter won’t be added as content to our page).
The title variable (which is set to 'Hey, hey!') will be used for the page <title> tag from the base layout, where it is referenced using {{ title }}. The same title value will be used in the <h1> tag from our home layout.
We’re also using the front matter to specify which layout we want index.md to use.
Alright, now, once you save all your files, you should see the following in your browser (you’ll need to retype npm start in your terminal if you’ve shut down your server):
Adding Sections of our Site with Partials
Templates are great for setting up common pages. But sometimes we just want to add a section of our site to most, if not all, pages. Like a navbar or a footer. These sections of the page are called "partials".
Let’s set up both a header and a footer. First off, create a new partials folder in src/_includes. Then create a new file called site-header.html and add the following HTML:
<!-- /src/_includes/partials/site-header.html -->

<header>
  <nav>
    <ul role="list">
      <li>
        <a href="/">Home</a>
      </li>
      <li>
        <a href="#">Contact</a>
      </li>
    </ul>
  </nav>
</header>
This is a very basic header to show you how it works.
To use the site-header.html partial we need to add a Nunjucks tag where we want it to appear. In our base layout (src/_includes/layouts/base.html) replace the the code in the <body></body> tags with:
{% include "partials/site-header.html" %}

<main>{% block content %}{% endblock %}</main>
While we’re here, let’s add a footer as well. In src/_includes/partials create a new file site-footer.html and add:
<!-- /src/_includes/partials/site-footer.html -->
<footer>
<p>© 2024 Rob McCormick</p>
</footer>Like with the site header, we need to include the partial in our base template (src/_includes/layouts/base.html). Just before the closing </body> tag add the following line:
{% include "partials/site-footer.html" %}Once you save all the files you should see your header and footer have been added to your home page. As we added them to the base template they’ll be added to any other page or layout extending the base template. So if you want to change them there’s only one file to update and it will flow through to every page using the partial. Pretty sweet!
A Simple Way to Add Styling
Eleventy is flexible, which means there are many different ways you can set it up to style your website. You can add the latest CSS post-processing and compilation - or keep things simple and use vanilla CSS.
We’re going to go for a bare-bones CSS setup.
First, create a new folder styles in the src folder, then add a file index.css. We just want to check it’s wired up and working, so add the following to your index.css file:
/* /src/styles/index.css */

h1 {
  color: goldenrod;
}
h1::after {
  content: ' 👋';
}
Now we need to link to the stylesheet from our base template. In the base template file (src/_includes/layouts/base.html) add the following line before the closing </head> tag:
<link rel="stylesheet" href="/styles/index.css">But if save your files and check your browser you’ll see we’ve got nothing. There’s no change.
This is because Eleventy isn’t aware of our CSS file, so doesn’t do anything with it. We can fix this by telling Eleventy to copy our CSS file to our output folder (public) and to watch for changes in our CSS file and update our site in the browser when we save it.
This is done by adding the following two lines to the Eleventy config file (below the first line and before the return).
// eleventy.config.js

module.exports = function (eleventyConfig) {
  eleventyConfig.addPassthroughCopy("./src/styles/");
  eleventyConfig.addWatchTarget("./src/styles/");

  return {
    markdownTemplateEngine: 'njk',
    dataTemplateEngine: 'njk',
    htmlTemplateEngine: 'njk',
    dir: {
      input: "src",
      output: "public",
    },
  };
};
If you check your site now, you should see our styles being applied to the main heading. Sweet!

Building out Jimmy’s Portfolio Site
Our site isn’t much to look at - and isn’t going to get Jimmy any freelance writing gigs. For that, we’re going to need a homepage with a bit about Jimmy, his headshot, and links to some articles he’s written.
To build Jimmy’s portfolio site you’ll need to download these files.
Once you unzip them, you should have two folders:
files_for_srcsvg
First, delete your styles folder. We’re going to replace it with a new version.
Next, open the folder files_for_src, and copy and paste all of its contents to your src folder. This will add:
- A couple of articles Jimmy wrote
- Files for the favicon
- The main font we’ll use for headings
- Images we’ll need for our design
- New styles for Jimmy’s site
And lastly, copy the svg folder into src/_includes.
Your src folder should now look like this:
src
  - _includes
    - layouts
    - partials
    - svg
  - articles
  - favicon
  - fonts
  - images
  - styles
  index.md
We’re going to use these files to build out Jimmy’s site. All the instructions are below, but if you’re unsure of something, you can always check the final version of Jimmy’s site.
Alright, let’s do this.
Update Footer Partial
Updating the footer is easy. Open your footer partial (src/_includes/partials/site-footer.html), delete the content and paste the following:
<!-- /src/_includes/partials/site-footer.html -->

<footer class="site-footer">
  <div class="container">
    <p>Jimmy Jones set up his site using <a href="https://robmc.dev/blog/getting-started-with-eleventy">Getting Started With Eleventy</a>.</p>
  </div>
</footer>
All done!
Update Header Partial
We have a little more to do with the header partial. Jimmy has branded his initials as two bananas forming his initials - JJ - which you’ll find in the svg folder.
We want to include this as an inline SVG, but we don’t want to have to copy and paste the SVG code every time we use it. Sounds like a job for a partial!
Right, open your header partial (src/_includes/partials/site-header.html), delete the content and paste in the following:
<!-- /src/_includes/partials/site-header.html -->

<header class="site-header">
  <nav class="container">
    <ul role="list">
      <li>
        <a href="/" aria-label="Jimmy Jones - Home">
          {% include "svg/banana-icon.svg" %} Jimmy Jones
        </a>
      </li>
    </ul>
  </nav>
</header>
You can see adding the SVG was as easy as adding any other partial. And doing it this way means it's added inline - so we can use CSS to style the SVG.
Update Home Layout
Like we did earlier, Jimmy’s site will use a home layout that extends the base layout. Open the home layout (/src/_includes/layouts/home.html), delete what’s there, and add:
<!-- /src/_includes/layouts/home.html -->

{% extends "layouts/base.html" %}

{% block content %}

  <section class="hero">
    <div class="container">
      <div class="hero__text">
        <h1>{{ intro.heading }}</h1>
        <p>{{ intro.blurb }}</p>
      </div>
      <img src="images/jimmy-jones-640.webp" alt="Headshot of Jimmy Jones, a journalist monkey">
    </div>
  </section>

  <section class="latest-articles">
    <div class="container">
      <div class="latest-articles__wrapper">
        <h2>Latest Articles</h2>
        <div class="latest-articles__card-holder">
          {% for article in collections.articles %}
            <article class="latest-articles__card">
              <a href="{{ article.url }}">
                <h2>{{ article.data.title }}</h2>
              </a>
            </article>
          {% endfor %}
        </div>
      </div>
    </div>
  </section>

{% endblock %}
Add Images and Fonts
You've probably noticed that in our new home layout we're missing an image. Instead of seeing Jimmy’s headshot, there is a white square with the alt text.
Similar to our styles, we need to let Eleventy know where the images are and that it should copy these files when it builds our site. We’ll also need to do the same for our font file.
Open up the Eleventy config file (eleventy.config.js) and add the following lines below the lines you added for CSS:
// eleventy.config.js

  eleventyConfig.addPassthroughCopy("./src/images/");
  eleventyConfig.addPassthroughCopy("./src/fonts/");
Add the Favicon
We’ve almost finished Jimmy’s home page. The last thing to add is the favicon.
While you have the Eleventy config file open, add the following line below the two you just added for images and fonts:
// eleventy.config.js

  eleventyConfig.addPassthroughCopy({"./src/favicon/": "/"});
This is a little different from what we did for our other files. For CSS, images, and fonts we want Eleventy to copy the files into the same folder as we have them in. So /src/styles will become /public/styles.
But our favicon files need to be in the root directory of our site. We could save them in the src folder, but that gets a bit messy. Instead, we can keep them in the favicon folder and tell Eleventy to copy them into the root directory when it builds our site. We do this by adding an object to our addPassthroughCopy that specifies which folder to find the files in, and where we want them to go in the final build: {"./src/favicon/" : "/"}.
Ok, one last thing and we’re done here.
We need to link to the favicon images in the <head> of our site. Open the base template (/src/_includes/layouts/base.html) and add the following lines before the closing </head> tag.
<!-- /src/_includes/layouts/home.html -->

<!-- Favicon -->
<link rel="icon" type="image/svg+xml" href="/favicon.svg">
<link rel="alternative icon" type="image/png" sizes="32x32" href="/favicon-32x32.png">
<link rel="apple-touch-icon" sizes="180x180" href="/favicon-196x196.png">
Add Text to the Home Page
At the moment we’re still using our initial index.md file for the home page, and none of the content is being shown. If you take a look at the home layout (src/_includes/layouts/home.html) you’ll notice that it doesn’t have the {{ content | safe }} tag anywhere. Instead, we’re referencing items from the variables intro and article.
The data for the intro items will come from the front matter of our index.md file, while the article data will come from our articles collection (which we’ll set up in the next section).
To add the right text to the home page, open the index.md file, delete what’s there and replace it with:
<!-- /src/index.md -->

---
title: "Jimmy Jones | Freelance Journalist"
layout: "layouts/home.html"
intro:
  heading: "Jimmy Jones"
  blurb: "Jimmy Jones is a freelance journalist. He investigates and writes about the banana industry. His articles have been featured in digital and media publications, including The Banana Republic, The Peal Review and Primates Magazine."
---
You’ll notice we’ve used nesting for the intro. To access these values we use dot notation. So to get the blurb, we use intro.blurb.
If you save the file and take a look at your site you should see it’s starting to take shape!
But you’ve probably noticed we’re missing our articles - there’s a big blank space under our heading “Latest Articles”. We’ll fix this in the next section.
Adding a Collection of Articles
In Eleventy, collections are a great way to group content. For Jimmy’s portfolio, we’re going to create an articles collection.
When you copied the files you downloaded to your project, this included a folder articles with two markdown files in it:
everything-you-know-about-bananas-is-wrong.mdmodern-bananas.md
If you open either file you’ll find it has some front matter at the top:
---
title: "Modern bananas: A sad tale of inbreeding and greed"
date: 2023-12-01
---
The title will be used in our template (when we create it). And the date is the date Jimmy wrote the article.
If we didn’t include a date in the front matter, Eleventy would use the date the file was created. But since we’re creating Jimmy’s site after he wrote the articles, we can override the default date by specifying the date we want in the front matter of each file.
You may have noticed we haven’t specified a layout to use. Ideally, we don’t want to have to specify the template in every article file. It’s repetitive - and we may forget to add it.
Luckily there’s an easier way. We can use a shortcut by turning the articles directory into a collection and specifying the layout for the entire collection (so it applies to all our article files).
To do this, create an articles.json file in the src/articles folder and add the following:
{
  "layout": "layouts/article.html",
  "tags": "articles"
}
Now we need to create the article layout. Create a new file article.html in src/_includes/layouts and paste in the following:
<!-- /src/_includes/layouts/article.html -->

{% extends "layouts/base.html" %}

{% block content %}
  <div class="article__highlight"></div>

  <div class="article__container">
    <article class="article__wrapper">
      <header class="article__header">
        <h1>{{ title }}</h1>
        <p>{{ date }}</p>
        <div class="article__author">
          <img src="../../images/jimmy-jones-640.webp" alt="Headshot of Jimmy Jones, a journalist monkey">
          <p>Jimmy Jones</p>
        </div>
      </header>

      <div class="prose">
        {{ content | safe }}
      </div>
    </article>
  </div>
{% endblock %}
This layout extends our base template, then uses the title and date we specified in the front matter of each file for the article header, and adds the content from the markdown file in a div with the class prose.
Give everything a save and Jimmy’s site should be taking shape!
You’ll notice on the home page we can now see cards for the articles under the “Latest Articles” heading. And both of these will link to the articles when you click their titles.
The code to make this all work is already in the home layout:
{% for article in collections.articles %}
<article class="latest-articles__card">
  <a href="{{ article.url }}">
    <h2>{{ article.data.title }}</h2>
  </a>
</article>
{% endfor %}
What we're doing here is using Nunjucks to loop through the articles collection we just created. Then, for each article, we create an article card that links to the article and uses the article's title. The title is access via the front-matter data, so is article.data.title.
For the articles, you’ll notice their url is a combination of our collection and the file name. The basic format is /collection-name/filename/.
Keep this in mind when you name your files and collections. And remember, if you change a file name you might have to set up a redirect to your new url if you’ve already published your site.
Finishing Touches
We’re nearly done. There are just a few final things we need to do to get Jimmy’s site just the way he wants it.
If you look at the final version, there are two things different from what we have so far:
- The articles on the home page are in the reverse order (newest first); and
- The date on the article pages is long and ugly.
Let’s fix these one at a time.
Change Articles to Newest First
By default, Eleventy will order our articles, and all collections, by date - from oldest to newest. But Jimmy wants people to see his latest article first. This is easy with Nunjucks. All we need to do is add a filter to our collection, which will reverse the order.
Open the home layout (src/_includes/layouts/home.html) and update line 20, where we loop through each article in our articles collection, with the following:
{% for article in collections.articles | reverse %}That’s it! All we need is to include | reverse.
Change the Article Date Format
Changing the format of the date is a little bit more involved.
At the moment if you click through to one of the articles you’ll see the date in a format along the lines of: TUE NOV 01 2023 01:00:00 GMT+0100 (CENTRAL EUROPEAN STANDARD TIME)
What we want is much simpler: “1 NOVEMBER 2023”.
To change the formatting we’re going to use the Luxon library. So first we’ll need to install it. In your terminal, make sure you’re in your project directory (mine is eleventy_starter_site), stop your server if it's running, and type:
npm install luxon --save-devOnce we have Luxon installed we can use it to create a custom filter in our eleventy.config.js file. At the top of the file, in the first line, include Luxon as a constant:
// eleventy.config.js

const { DateTime } = require("luxon");
Then, between our addPassthroughCopy statements and the return, add:
  eleventyConfig.addFilter("postDate", (dateObj) => {
    return DateTime.fromJSDate(dateObj).toLocaleString(DateTime.DATE_FULL);
  });
What we’re doing here is adding a new filter, which we’re calling postDate. This takes our date and uses Luxon (via the DataTime constant we created with it) to convert it to the format we want (DATE_FULL). If you want a different format for your date, there is a useful list of Luxon presets.
We can use our new filter in the same way as we used reverse for our articles. In our article layout (src/_includes/layouts/article.html) add the filter to the date variable on line 10. It should look like this when you’re done:
<p>{{ date | postDate }}</p>Give the file a save, restart your server and take a look at your site. Your date should be much easier to read.
And that's it, we're all done!
Thanks for following along, and hopefully you now know the basics of Eleventy and can use it for your next site.
Next Steps
Now you know the basics, you might want to build out your site with more features, pages and data. These are some useful references to help you:
- Process your CSS and JavaScript so it’s production ready
- Use data from multiple sources
- Perform image transformations with the Image plugin
And for a more thorough tutorial, Andy Bell’s Learn Eleventy From Scratch course is a great resource (parts are a bit out of date, mainly the CSS and JavaScript processing, but it’s free and has a lot of gems in there).